2016年7月8日 星期五
Custom Android Media Controller
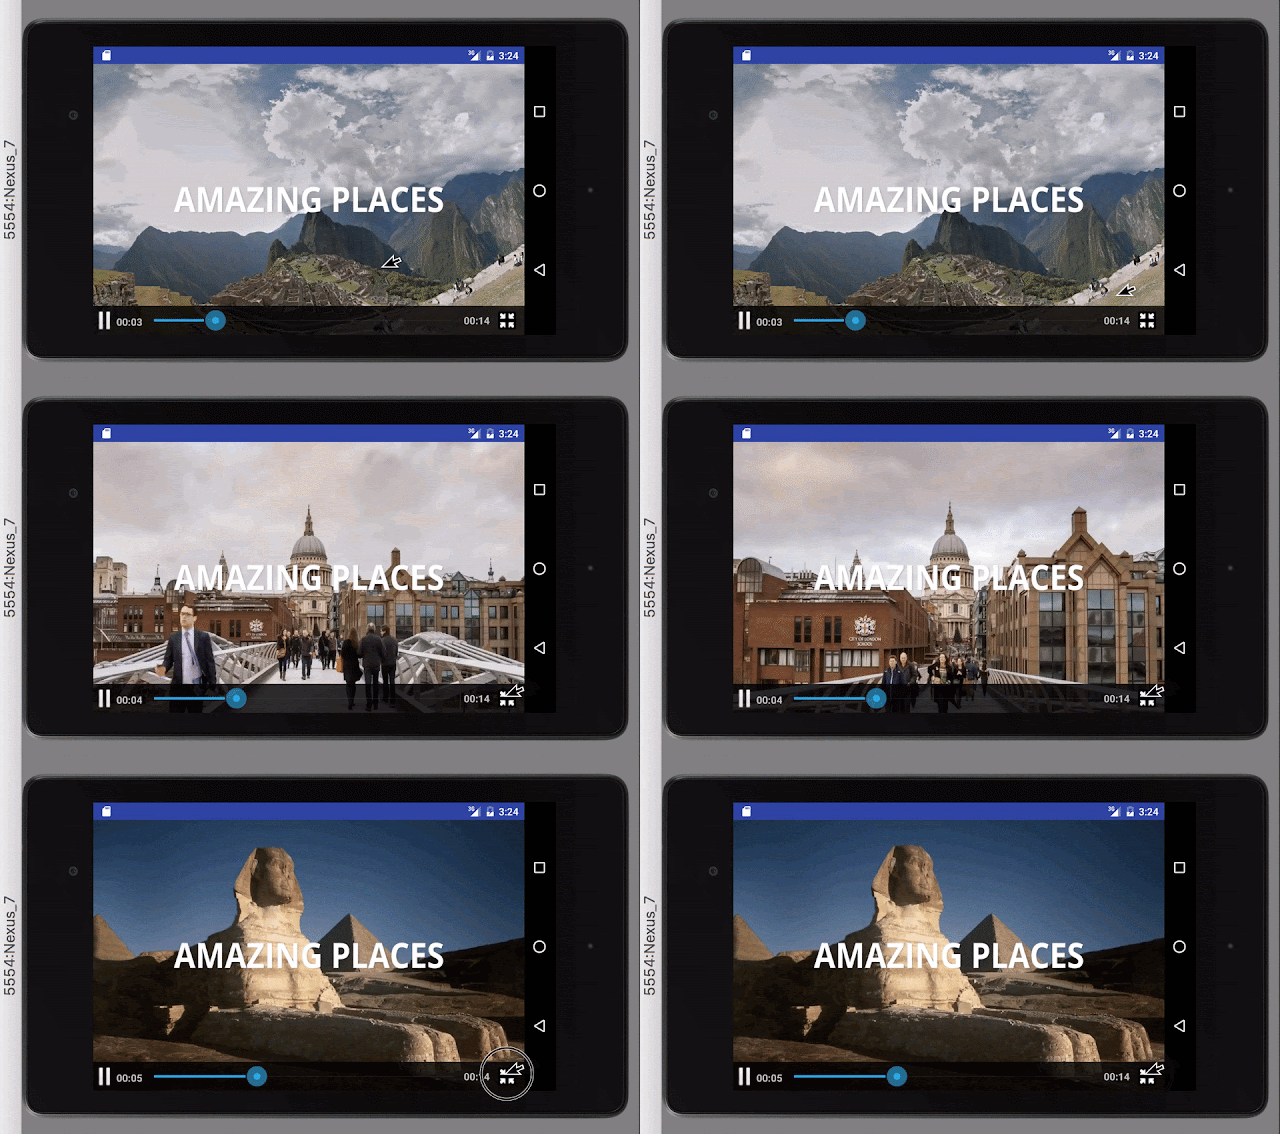
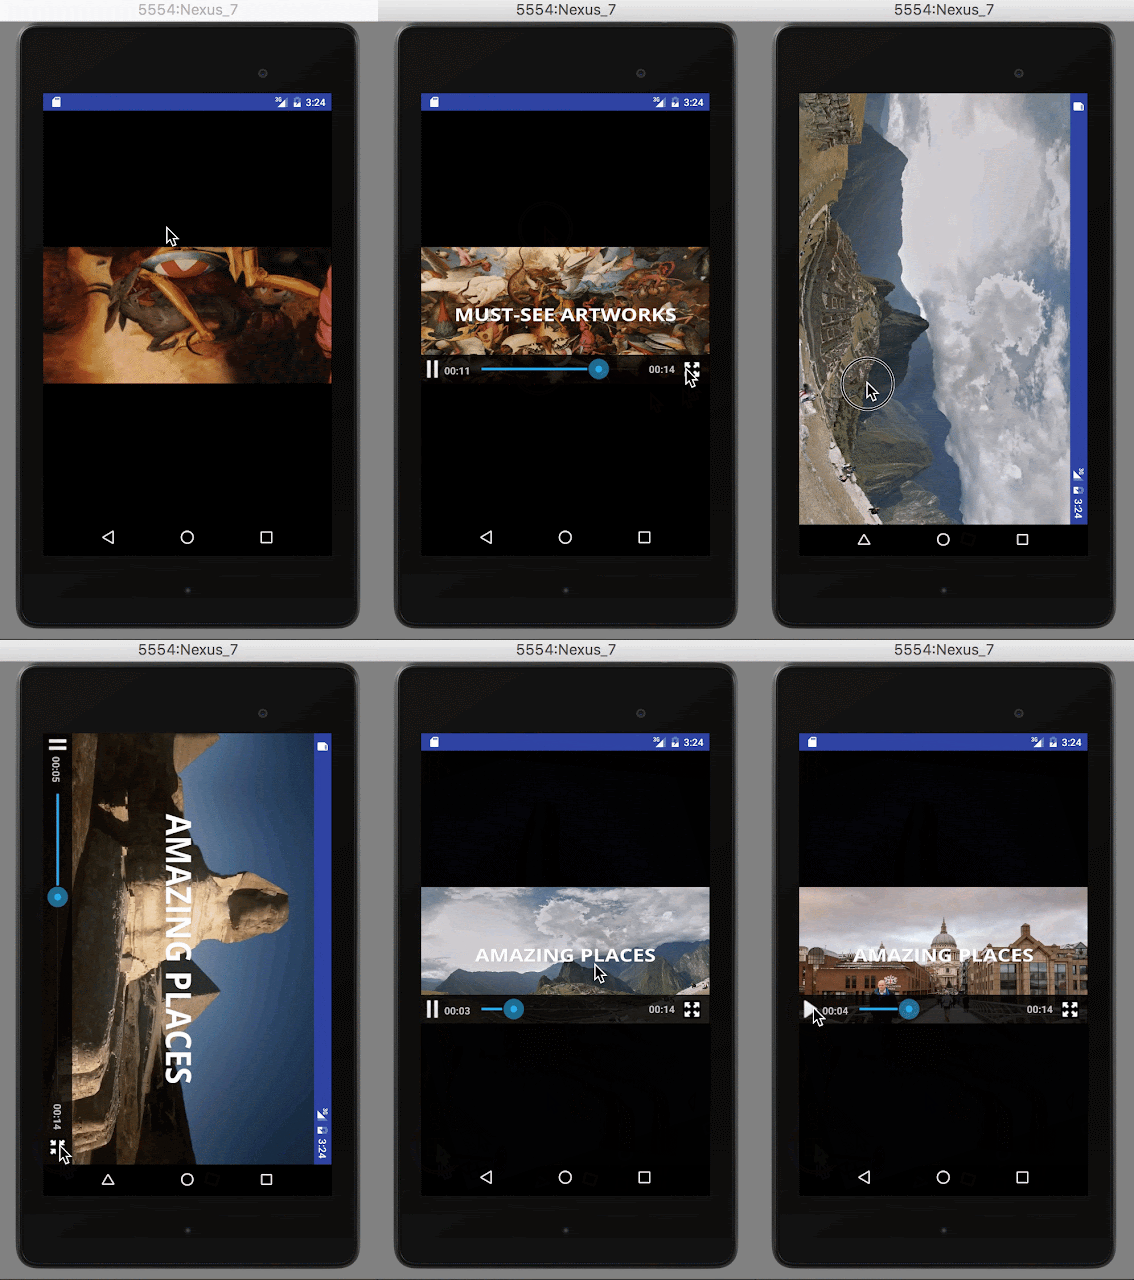
The default media controller of Android typically contains the buttons like "Play/Pause", "Rewind", "Fast Forward" and a progress slider. Instead of "Rewind" and "Fast Forward" buttons, sometimes what we need is a full screen toggle button. Based on this StackOverflow post, we can implement our own media controller instead of scratching in this post.
Pre-Conditions
- Download VideoControllerView.java and change the package name to match your project
- Download media_controller.xml into your project’s layout folder
- Download the 4 images into your project’s drawable folder: ic_media_play.png, ic_media_pause.png, ic_media_fullscreen_shrink.png and ic_media_fullscreen_stretch.png

- Visit Android Holo Colors Generator to create the style of SeekBar, and put them in drawable(or mipmap) and values/style.xml

style.xml
Create an Activity(FullscreenVideoActivity.java) with Layout(activity_fullscreen_video.xml)
FullscreenVideoActivity.java
- Initial MediaPlayer and VideoControlView
- Implement interface SurfaceHolder.Callback
// Implement SurfaceHolder.Callback @Override public void surfaceChanged(SurfaceHolder holder, int format, int width, int height) {} @Override public void surfaceCreated(SurfaceHolder holder) { mediaPlayer.setDisplay(holder); mediaPlayer.prepareAsync(); } @Override public void surfaceDestroyed(SurfaceHolder holder) {} // End SurfaceHolder.Callback - Implement interface MediaPlayer.OnPreparedListener
// Implement MediaPlayer.OnPreparedListener @Override public void onPrepared(MediaPlayer mp) { controller.setMediaPlayer(this); controller.setAnchorView((FrameLayout) findViewById(R.id.videoSurfaceContainer)); mediaPlayer.start(); } // End MediaPlayer.OnPreparedListener - Implement interface VideoControllerView.MediaPlayerControl
In the project, we implement toggleFullScreen() and isFullScreen() to switch between normal(PORTRAIT) and full-screen mode(LANDSCAPE).// Implement VideoMediaController.MediaPlayerControl @Override public boolean canPause() { return true; } @Override public boolean canSeekBackward() { return true; } @Override public boolean canSeekForward() { return true; } @Override public int getBufferPercentage() { return 0; } @Override public int getCurrentPosition() { return mediaPlayer.getCurrentPosition(); } @Override public int getDuration() { return mediaPlayer.getDuration(); } @Override public boolean isPlaying() { return mediaPlayer.isPlaying(); } @Override public void pause() { mediaPlayer.pause(); } @Override public void seekTo(int i) { mediaPlayer.seekTo(i); } @Override public void start() { mediaPlayer.start(); } @Override public boolean isFullScreen() { boolean isFullScreen = (getResources().getConfiguration().orientation==2); Log.d(TAG, "isFullScreen: "+isFullScreen); return isFullScreen; } @Override public void toggleFullScreen() { Log.d(TAG, "toggleFullScreen"); mediaPlayer.pause(); if(getResources().getConfiguration().orientation==1){ this.setRequestedOrientation(ActivityInfo.SCREEN_ORIENTATION_LANDSCAPE); }else{ this.setRequestedOrientation(ActivityInfo.SCREEN_ORIENTATION_PORTRAIT); } } - Implement touch event to show media controller
//Show the media controller @Override public boolean onTouchEvent(MotionEvent event) { controller.show(); return false; }
public class FullscreenVideoActivity extends Activity implements SurfaceHolder.Callback,
        MediaPlayer.OnPreparedListener, VideoControllerView.MediaPlayerControl {
    private String TAG = "FullscreenVideoActivity";
    SurfaceView videoSurface;
    private MediaPlayer mediaPlayer;
    private VideoControllerView controller;

    @Override
    protected void onCreate(Bundle savedInstanceState) {
        super.onCreate(savedInstanceState);
        setContentView(R.layout.activity_fullscreen_video);
        videoSurface = (SurfaceView) findViewById(R.id.videoSurface);
        SurfaceHolder videoHolder = videoSurface.getHolder();
        videoHolder.addCallback(this);
        String videoPath =  "android.resource://" + getPackageName() + "/" + R.raw
                .sample_video;
        mediaPlayer = new MediaPlayer();
        controller = new VideoControllerView(this);
        try {
            mediaPlayer.setAudioStreamType(AudioManager.STREAM_MUSIC);
            mediaPlayer.setDataSource(this, Uri.parse(videoPath));
            mediaPlayer.setOnPreparedListener(this);
        } catch (IllegalArgumentException | SecurityException | IllegalStateException |
                IOException e) {
            e.printStackTrace();
        }
    }
}
activity_fullscreen_video.xml
- Default layout(PORTRAIT)
- Create LANDSCAPE layout
Create a folder named layout-land in res, and create a layout file with the same name as activity_fullscreen_video.xml in it.

Comment the unused component in VideoControllerView.java
private void initControllerView(View v) {
    mPauseButton = (ImageButton) v.findViewById(R.id.pause);
    if (mPauseButton != null) {
        mPauseButton.requestFocus();
        mPauseButton.setOnClickListener(mPauseListener);
    }

    mFullscreenButton = (ImageButton) v.findViewById(R.id.fullscreen);
    if (mFullscreenButton != null) {
        mFullscreenButton.requestFocus();
        mFullscreenButton.setOnClickListener(mFullscreenListener);
    }

//        mFfwdButton = (ImageButton) v.findViewById(R.id.ffwd);
//        if (mFfwdButton != null) {
//            mFfwdButton.setOnClickListener(mFfwdListener);
//            if (!mFromXml) {
//                mFfwdButton.setVisibility(mUseFastForward ? View.VISIBLE : View.GONE);
//            }
//        }
//
//        mRewButton = (ImageButton) v.findViewById(R.id.rew);
//        if (mRewButton != null) {
//            mRewButton.setOnClickListener(mRewListener);
//            if (!mFromXml) {
//                mRewButton.setVisibility(mUseFastForward ? View.VISIBLE : View.GONE);
//            }
//        }

    // By default these are hidden. They will be enabled when setPrevNextListeners() is called
//        mNextButton = (ImageButton) v.findViewById(R.id.next);
//        if (mNextButton != null && !mFromXml && !mListenersSet) {
//            mNextButton.setVisibility(View.GONE);
//        }
//        mPrevButton = (ImageButton) v.findViewById(R.id.prev);
//        if (mPrevButton != null && !mFromXml && !mListenersSet) {
//            mPrevButton.setVisibility(View.GONE);
//        }

    mProgress = (SeekBar) v.findViewById(R.id.mediacontroller_progress);
    if (mProgress != null) {
        if (mProgress instanceof SeekBar) {
            SeekBar seeker = (SeekBar) mProgress;
            seeker.setOnSeekBarChangeListener(mSeekListener);
        }
        mProgress.setMax(1000);
    }

    mEndTime = (TextView) v.findViewById(R.id.time);
    mCurrentTime = (TextView) v.findViewById(R.id.time_current);
    mFormatBuilder = new StringBuilder();
    mFormatter = new Formatter(mFormatBuilder, Locale.getDefault());

    installPrevNextListeners();
}
Result
2016年6月26日 星期日
Building a Simple Video Player
In this exercise,
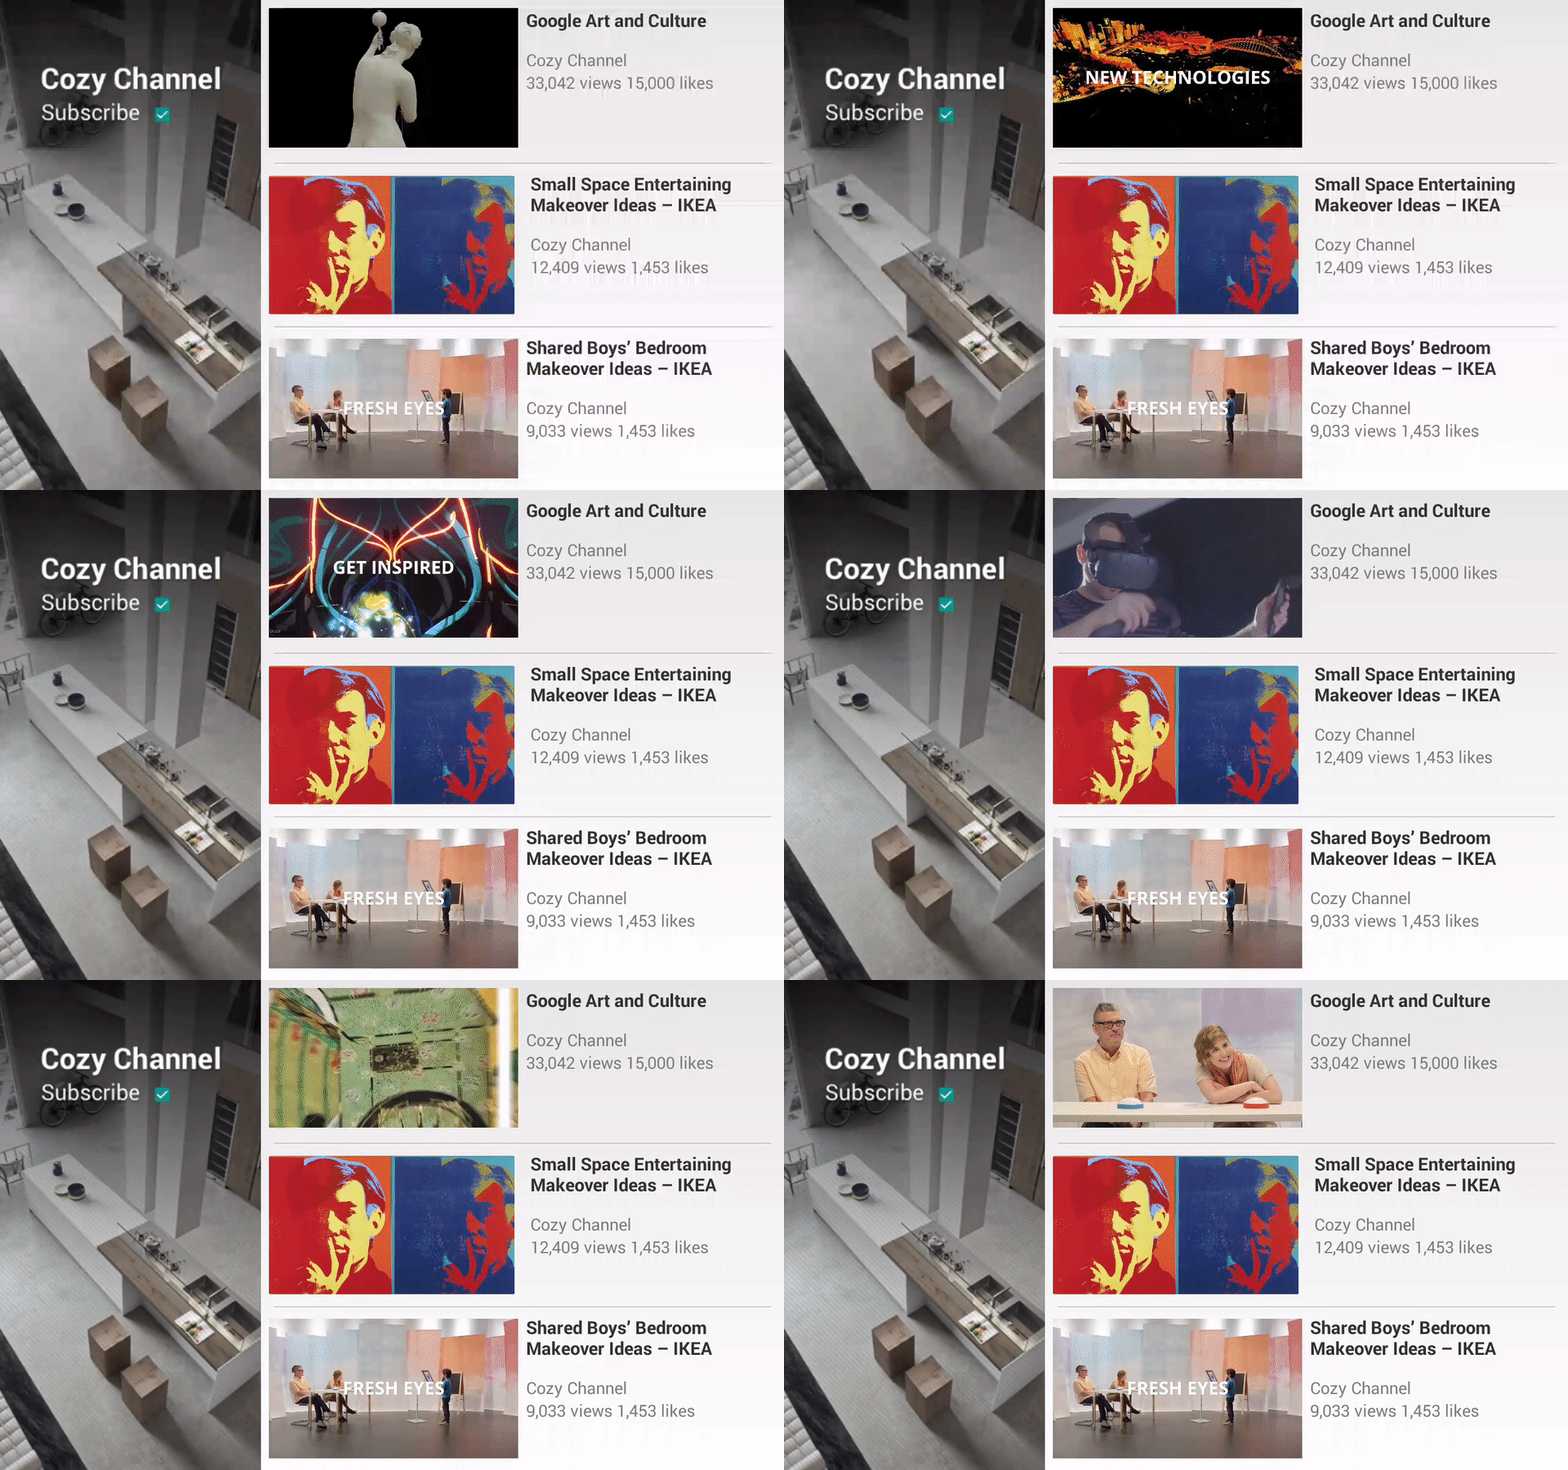
- A small VideoView without media controller will auto play video at the beginning of launching app;
- If we single touch the VideoView, it will activate full screen mode and resume it at the stopped position in small VideoView;
- If we touch the back button in full screen mode, it will return to the small VideoView and and resume it at the stopped position in full screen mode.
Basic VideoView
- Create an empty project
- Create a folder named raw in res
- Add a local video in MP4 format in raw folder

- Create a MainActivity with layout(activity_main.xml)
activity_main.xml
MainActivity.java
public class MainActivity extends AppCompatActivity {
    private String TAG = "MainActivity";
    private VideoView videoView;
    private String videoPath;
    @Override
    protected void onCreate(Bundle savedInstanceState) {
        super.onCreate(savedInstanceState);
        setRequestedOrientation(ActivityInfo.SCREEN_ORIENTATION_LANDSCAPE);
        setContentView(R.layout.activity_main);
        videoView = (VideoView) this.findViewById(R.id.video_view);
        videoPath = "android.resource://" + getPackageName() + "/" + R.raw
                .google_arts_and_culture;
        videoView.setVideoURI(Uri.parse(videoPath));
        videoView.start();
    }
}
Full Screen VideoView with MediaController
Create a FullscreenVideoActivity with layout(activity_fullscreen_video.xml)activity_fullscreen_video.xml
FullscreenVideoActivity.java
public class FullscreenVideoActivity extends Activity {
    private String TAG = "FullscreenVideoActivity";
    private VideoView videoView;
    private MediaController mc;
    private String videoPath;
    @Override
    protected void onCreate(Bundle savedInstanceState) {
        super.onCreate(savedInstanceState);
        setContentView(R.layout.activity_fullscreen_video);
        mc = new MediaController(this);
        videoView = (VideoView) this.findViewById(R.id.fullscreen_video_view);
        videoView.setMediaController(mc);
        videoPath = "android.resource://" + getPackageName() + "/" + R.raw
                .google_arts_and_culture;
        videoView.setVideoURI(Uri.parse(videoPath));
        videoView.start();
    }
}
From Basic VideoView into Full Screen Mode
Attaching a SimpleOnGestureListener to basic the VideoView for triggering full screen.MainActivity.java
public class MainActivity extends AppCompatActivity {
    private String TAG = "MainActivity";
    private int stopPosition;
    private VideoView videoView;
    private String videoPath;

    @Override
    protected void onCreate(Bundle savedInstanceState) {
        super.onCreate(savedInstanceState);
        setRequestedOrientation(ActivityInfo.SCREEN_ORIENTATION_LANDSCAPE);
        setContentView(R.layout.activity_main);
        videoView = (VideoView) this.findViewById(R.id.video_view);
        videoPath = "android.resource://" + getPackageName() + "/" + R.raw
                .google_arts_and_culture;
        videoView.setVideoURI(Uri.parse(videoPath));
        videoView.start();
        final GestureDetector gestureDetector = new GestureDetector(this, gestureListener);
        videoView.setOnTouchListener(new View.OnTouchListener() {
            @Override
            public boolean onTouch(View v, MotionEvent event) {
                return gestureDetector.onTouchEvent(event);
            }
        });
    }

    final GestureDetector.SimpleOnGestureListener gestureListener =
            new GestureDetector.SimpleOnGestureListener() {
        @Override
        public boolean onDown(MotionEvent event) {
            return true;
        }

        @Override
        public boolean onSingleTapUp(MotionEvent event) {
            Log.e(TAG, "onSingleTapUp");
            return true;
        }
        @Override
        public boolean onSingleTapConfirmed(MotionEvent e) {
            Log.e(TAG, "onSingleTapConfirmed");
            videoView.pause();
            stopPosition = videoView.getCurrentPosition();
            Intent intent = new Intent(MainActivity.this, FullscreenVideoActivity.class);
            intent.putExtra("videoPath", videoPath);
            intent.putExtra("stopPosition", stopPosition);
            startActivity(intent);
            return true;
        }

        @Override
        public void onLongPress(MotionEvent e) {
            super.onLongPress(e);
            Log.e(TAG, "onLongPress");
        }

        @Override
        public boolean onDoubleTap(MotionEvent e) {
            Log.e(TAG, "onDoubleTap");
            return super.onDoubleTap(e);
        }
    };
}
FullscreenVideoActivity.javapublic class FullscreenVideoActivity extends Activity {
private String TAG = "FullscreenVideoActivity";
private VideoView videoView;
private MediaController mc;
private String videoPath;
private int stopPosition;
@Override
protected void onCreate(Bundle savedInstanceState) {
super.onCreate(savedInstanceState);
setContentView(R.layout.activity_fullscreen_video);
Bundle params = getIntent().getExtras();
videoPath = params.getString("videoPath");
stopPosition = params.getInt("stopPosition");
mc = new MediaController(this);
videoView = (VideoView) this.findViewById(R.id.fullscreen_video_view);
videoView.setMediaController(mc);
videoView.setVideoURI(Uri.parse(videoPath));
Log.e(TAG, "FullscreenVideoView intent stop position: " + stopPosition);
videoView.seekTo(stopPosition);
videoView.start();
}
}
Back to Basic VideoView from Full Screen Mode
Overriding onResume() method of MainActivity for getting bundle with video stop position and file path from FullscreenVideoActivity.MainActivity.java
@Override
protected void onResume() {
    super.onResume();
    Bundle params = getIntent().getExtras();
    if(null != params){
        Log.e(TAG, "VideoView intent stop position: " + stopPosition);
        videoPath = params.getString("videoPath");
        stopPosition = params.getInt("stopPosition");
        videoView.seekTo(stopPosition);
        videoView.start();
    }
}
FullscreenVideoActivity.javaOverriding onBackPressed() method of FullscreenVideoActivity for going back to MainActivity with video stop position and file path.
@Override
public void onBackPressed() {
    super.onBackPressed();
    videoView.pause();
    stopPosition = videoView.getCurrentPosition();
    Intent intent = new Intent(FullscreenVideoActivity.this, MainActivity.class);
    intent.putExtra("videoPath", videoPath);
    intent.putExtra("stopPosition", stopPosition);
    startActivity(intent);
}
Result
View on GitHub
2016年6月20日 星期一
Creating a Line BOT on Microsoft Azure

Pre-conditions
- Node.js with Express & Jade
- Microsoft Azure App Service
- Line BOT trial account
Node.js with Express & Jade
- Install Node.js with Express & Jade
- Create an Express project (Ref.: Express application generator)
$ express LineBOT
- Install dependencies
$ cd LineBOT
$ npm install
- Run the app
$ DEBUG=LineBot:* npm start
> LineBOT@0.0.0 start /Users/phchu/Documents/Nodejs/LineBOT
> node ./bin/www
- Open the url
GET / 304 400.918 ms - -
GET /stylesheets/style.css 304 3.950 ms - -

Microsoft Azure App Service
Advantages:- Free
- SSL(https)
- fixed IP address (it's important to configure Line BOT callback server's white list)
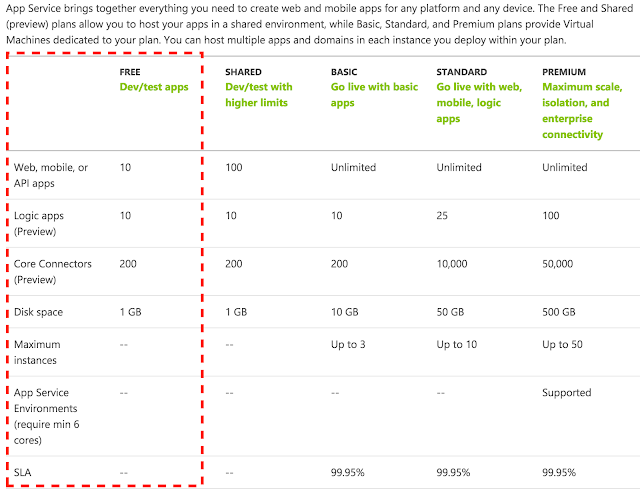

Deploy the "LineBOT" project generated in previous step
- Install Azure CLI & login
$ azure login
info:    Executing command login
|info:    To sign in, use a web browser to open the page https://aka.ms/devicelogin. Enter the code ********* to authenticate.
/info:    Added subscription Enterprise
info:    Added subscription Azure in Open
+
info:    login command OK
- Create the site by "azure site create --git {appname}"
$ azure site create --git phbot
azure site create --git phbot
info:    Executing command site create
+ Getting sites
+ Getting locations
help:    Choose a location
  1) South Central US
  2) North Europe
  3) West Europe
  4) Southeast Asia
  5) East Asia
  6) West US
  7) East US
  8) Japan West
  9) Japan East
  10) East US 2
  11) North Central US
  12) Central US
  13) Brazil South
  14) Canada Central
  15) Canada East
  : 5
info:    Creating a new web site at phbot.azurewebsites.net
\info:    Created website at phbot.azurewebsites.net
+
info:    Executing `git init`
info:    Creating default iisnode.yml file
info:    Initializing remote Azure repository
+ Updating site information
info:    Remote azure repository initialized
+ Getting site information
+ Getting user information
help:    Please provide the username for Git deployment
Publishing username: phchu
info:    Executing `git remote add azure https://phchu@phbot.scm.azurewebsites.net/phbot.git`
info:    A new remote, 'azure', has been added to your local git repository
info:    Use git locally to make changes to your site, commit, and then use 'git push azure master' to deploy to Azure
info:    site create command OK
- Deploy app to Azure
$ git add .
$ git commit -m "initial commit"
[master (root-commit) e2a8aba] initial commit
 12 files changed, 314 insertions(+)
 create mode 100644 .vscode/launch.json
 create mode 100644 app.js
 create mode 100755 bin/www
 create mode 100644 iisnode.yml
 create mode 100644 npm-debug.log
 create mode 100644 package.json
 create mode 100644 public/stylesheets/style.css
 create mode 100644 routes/index.js
 create mode 100644 routes/users.js
 create mode 100644 views/error.jade
 create mode 100644 views/index.jade
 create mode 100644 views/layout.jade
$ git push azure master
- Finally, launch the Azure app in the browser:

Tip: Use "azure site log tail" to see the console log
$ azure site log tail
info:    Executing command site log tail
+ Getting site information
Welcome, you are now connected to log-streaming service.
Line BOT trial account
We have to get the following attributes from the trial account:
- Channel ID
- Channel Secret (Click "Show" button to see it)
- MID
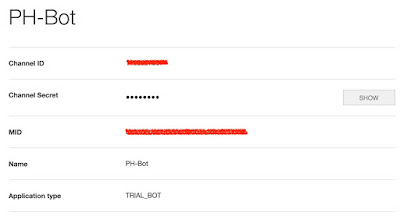
Configure the Line BOT account attributes in project
Creating a file named "config.js" as below:module.exports = {
'LINE':{
CHANNEL_ID: '1234567890',
CHANNEL_SERECT: '1ad5135ufygthrjekadf107d2',
MID: '0s98d7f65g4h3jki2u3y4t5re678w9',
}
};
Setup the "Callback URL" in channel
Callback URL format: http://[app_name].azurewebsites.net:433/[router]Ref.: Getting started with BOT API Trial-Registering a callback URL
https://phbot.azurewebsites.net:443/callback
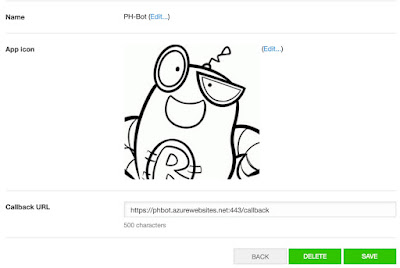
Create the callback router in the project
- Create "callback.js" in folder routes
var express = require('express'); var router = express.Router(); /* GET line bot callback. */ router.post('/', function(req, res, next) { res.send('respond with a resource'); }); module.exports = router; - Configure the routing in app.js
var callback = require('./routes/callback'); app.use('/callback', callback); - Verify the callback URL
Click the "VERIFY" button, and it will show "Success." message.

$ azure site log tail
info:    Executing command site log tail
+ Getting site information
Welcome, you are now connected to log-streaming service.
POST /callback 200 6.439 ms - 23
Line BOT API
Add fixed propreties in config.js
module.exports = {
    'LINE':{
 API: 'https://trialbot-api.line.me/v1/',
 CHANNEL_ID: '1234567890',
 CHANNEL_SERECT: '1ad5135ufygthrjekadf107d2',
 MID: '0s98d7f65g4h3jki2u3y4t5re678w9',
 TEXT: 1,
 IMAGE: 2,
    }
};
Receive message
- Add BOT as a friend by scanning the QR-code above Callback URL

- Add console.log in callback.js to show message content then commit it
/* GET line bot callback. */ router.post('/', function(req, res, next) { console.log('callback: ', req.body); var result = req.body.result; for(var i=0; i < result.length; i++){ var data = result[i].content; console.log('message content: ', data); } }); - Say "Hi, BOT" to the online Line BOT

Console:
callback:  { result:
   [ { content: [Object],
       createdTime: 1466386987962,
       eventType: '138311609000106303',
       from: 'u09y8t76r5e4ws8d7f6g5h4jdfghjkxcvbnmkl',
       fromChannel: 1341301815,
       id: 'WB1520-3548181394',
       to: [Object],
       toChannel: 1234567890 } ] }
message content:  { toType: 1,
  createdTime: 1466386987943,
  from: 'u09y8t76r5e4ws8d7f6g5h4jdfghjkxcvbnmkl',
  location: null,
  id: '4488676771230',
  to: [ 'sdfghjk8f7gh6j5k4l30lk98j7h6g5f4d3s' ],
  text: 'Hi, BOT',
  contentMetadata: { AT_RECV_MODE: '2', SKIP_BADGE_COUNT: 'true' },
  deliveredTime: 0,
  contentType: 1,
  seq: null }
Send text message
- Install module dependency: request
npm install request --save
- Add a new function sendMessage to reply(repeat) sender's message
function sendMessage(sender, content, type) { console.log('Send message: ', content); var query_fields = 'events'; var data; switch (type) { case config.LINE.TEXT: data = { to: [sender], //Array of target user. Max count: 150. toChannel: 1383378250, //Fixed value eventType: '138311608800106203',//Fixed value content: { contentType: type, toType: 1, text: content } }; break; default: break; } console.log('Send data: ', data); request({ url: config.LINE.API.concat(query_fields), headers: { 'Content-Type': 'application/json; charset=UTF-8', 'X-Line-ChannelID': config.LINE.CHANNEL_ID, 'X-Line-ChannelSecret': config.LINE.CHANNEL_SERECT, 'X-Line-Trusted-User-With-ACL': config.LINE.MID }, method: 'POST', body: JSON.stringify(data) }, function (error, response, body) { if (error) { console.log('Error sending message: ', error); } else if (response.body.error) { console.log('Error: ', response.body.error); } console.log('Send message response: ', body); }); } - Reply sender's message by repeating it
/* GET line bot callback. */ router.post('/', function(req, res, next) { console.log('callback: ', req.body); var result = req.body.result; for(var i = 0; i < result.length; i++){ var data = result[i].content; console.log('message content: ', data); sendMessage(data.from, data.text, config.LINE.TEXT); } }); - Commit and Try it

Ater replying message successfully, the BOT will receive a response with messageId and timestamp.
Console
Send message response:
{
 "failed": [],
 "messageId": "1466392481962",
 "timestamp": 1466392481962,
 "version": 1
}
If you received the following response, add the denied IP address in whitelist
Send message response:
{
  "statusCode": "427",
  "statusMessage": "Your ip address [213.73.167.123] is not allowed to access this API. Please add your IP to the IP whitelist in the developer center."
}
Get user profile
- Add a new function queryProfile to query sender's name
function queryProfile(sender, callback) { var query_fields = 'profiles?mids='; request({ url: config.LINE.API.concat(query_fields, sender), headers: { 'Content-Type': 'application/json; charset=UTF-8', 'X-Line-ChannelID': config.LINE.CHANNEL_ID, 'X-Line-ChannelSecret': config.LINE.CHANNEL_SERECT, 'X-Line-Trusted-User-With-ACL': config.LINE.MID }, method: 'GET' }, function (error, response, body) { if (error) { console.log('Error sending message: ', error); } else if (response.body.error) { console.log('Error: ', response.body.error); } var jsonResult = JSON.parse(body); console.log('Profile response: ', jsonResult); for (var i = 0; i < jsonResult.count; i++) { var userName = jsonResult.contacts[i].displayName; console.log('User name: ', userName); callback(userName); } }); } - Reply sender's message by saying "Hi, [user_name]"
/* GET line bot callback. */ router.post('/', function(req, res, next) { console.log('callback: ', req.body); var result = req.body.result; for(var i = 0; i < result.length; i++){ var data = result[i].content; console.log('message content: ', data); queryProfile(data.from, function(user) { var reply_msg = 'Hi, '.concat(user); sendMessage(data.from, reply_msg, config.LINE.TEXT); }); } }); - Commit and Try it

Console:
Profile response:
{ contacts:
   [ { displayName: 'phchu',
       mid: 'sdfghjk8f7gh6j5k4l30lk98j7h6g5f4d3s',
       pictureUrl: '',
       statusMessage: '' } ],
  count: 1,
  display: 1,
  pagingRequest: { start: 1, display: 1, sortBy: 'MID' },
  start: 1,
  total: 1 }
User name:  phchu
Send message:  Hi, phchu
Send data:  { to: [ 'sdfghjk8f7gh6j5k4l30lk98j7h6g5f4d3s' ],
  toChannel: 1383378250,
  eventType: '138311608800106203',
  content: { contentType: 1, toType: 1, text: 'Hi, phchu' } }
Send message response:  {"failed":[],"messageId":"1466394625241","timestamp":1466394625241,"version":1}
Send image message
- Reply sender's message by an image
If sender's message contains string "Hi,", replying message by saying "Hi, [user_name]". Otherwise, replying the image sticker as below.

- Add a new image message type in sendMessage function
case config.LINE.IMAGE: data = { to: [sender], toChannel: 1383378250, eventType: '138311608800106203', content: { contentType: type, toType: 1, originalContentUrl: content, previewImageUrl: content } }; break; - Commit and Try it

Console:
Send message:  https://sdl-stickershop.line.naver.jp/products/0/0/4/1331/android/stickers/23770.png
Send data:  { to: [ 'sdfghjk8f7gh6j5k4l30lk98j7h6g5f4d3s' ],
  toChannel: 1383378250,
  eventType: '138311608800106203',
  content:
   { contentType: 2,
     toType: 1,
     originalContentUrl: 'https://sdl-stickershop.line.naver.jp/products/0/0/4/1331/android/stickers/23770.png',
     previewImageUrl: 'https://sdl-stickershop.line.naver.jp/products/0/0/4/1331/android/stickers/23770.png' } }
Send message response:  {"failed":[],"messageId":"1466396249482","timestamp":1466396249482,"version":1}
Final Result
View on GitHub
2016年6月4日 星期六
Justifying text in an Android app using a WebView instead of TextView
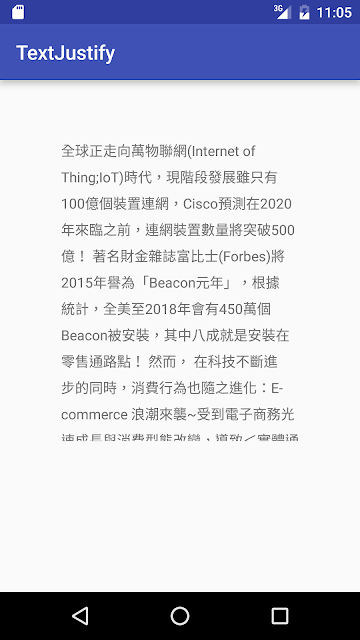
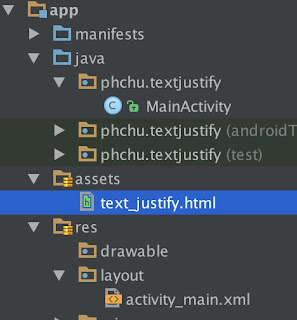
public class MainActivity extends AppCompatActivity {
    private static final String TEXT_JUSTIFY =
           "file:///android_asset/text_justify.html?info=";
    @Override
    protected void onCreate(Bundle savedInstanceState) {
        super.onCreate(savedInstanceState);
        setContentView(R.layout.activity_main);
        WebView desWebView = (WebView)findViewById(R.id.content_description_webview);
        String content = getResources().getString(R.string.content);
        desWebView.getSettings().setJavaScriptEnabled(true);
        desWebView.loadUrl(TEXT_JUSTIFY + content);
    }
}
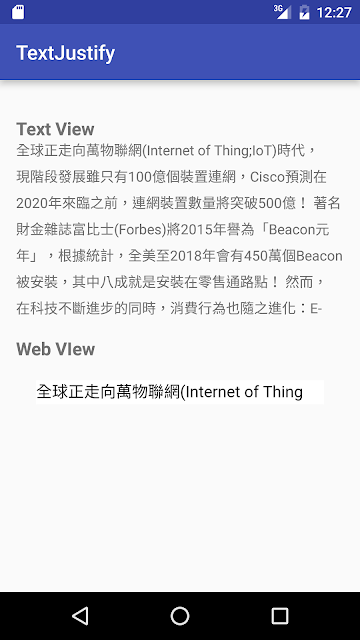
But there is also a problem: words after semicolon(";") of 1st line are disappear. The content string should be encoded before load in html page.
public class MainActivity extends AppCompatActivity {
    private static final String TEXT_JUSTIFY =
           "file:///android_asset/text_justify.html?info=";
    @Override
    protected void onCreate(Bundle savedInstanceState) {
        super.onCreate(savedInstanceState);
        setContentView(R.layout.activity_main);
        WebView desWebView = (WebView)findViewById(R.id.content_description_webview);
        String content = getResources().getString(R.string.content);
        desWebView.getSettings().setJavaScriptEnabled(true);
        try{
            desWebView.loadUrl(TEXT_JUSTIFY + URLEncoder.encode(content, "utf-8"));
        }catch (UnsupportedEncodingException uee){
            uee.printStackTrace();
        }
    }
}

The method still have a problem, if the WebView on a layout with background color, it's not transparent.

public class MainActivity extends AppCompatActivity {
    private static final String TEXT_JUSTIFY =
           "file:///android_asset/text_justify.html?info=";
    @Override
    protected void onCreate(Bundle savedInstanceState) {
        super.onCreate(savedInstanceState);
        setContentView(R.layout.activity_main);
        WebView desWebView = (WebView)findViewById(R.id.content_description_webview);
        String content = getResources().getString(R.string.content);
        desWebView.getSettings().setJavaScriptEnabled(true);
        desWebView.setBackgroundColor(0x00000000);
        try{
            desWebView.loadUrl(TEXT_JUSTIFY + URLEncoder.encode(content, "utf-8"));
        }catch (UnsupportedEncodingException uee){
            uee.printStackTrace();
        }
    }
}

View Source Code on GitHub.
2016年5月19日 星期四
Basic CRUD operations in LokiJS
LokiJS (http://lokijs.org/#/) is a lightweight JavaScript in-memory database.Installation
nam install lokijs --save
Initial Database
Basic
var db = new lokijs('db.json');The db.json will be created in the <root> folder, i.e. <root>/db.json.Custom path
var path = require('path');
var db = new lokijs(path.join(__dirname, '..', 'data', 'db.json'));
The db.json will be created in the <root>/data folder, i.e. <root>/data.db.json.Initial Collection
var info = db.getCollection('info');
if(!info){
  info = db.addCollection('info');
}
First, getCollection() by collection name 'info', and check if the collection exists. If the collection does not exist, then create a collection by addCollection() with collection name 'info'.CRUD operations
Create
info.insert({
  name: 'phchu',
  age: 18
});
Read
var user = info.findObject({'name':'phchu'});
The return result user is an object, that you can get other attributes by dot, e.g. user.age to get the phchu's age. The findObject() is not the only operation to query result from database, you can reference the API document (http://lokijs.org/#/docs#find) for details.Update
user.age = 30;
info.update(user);
Delete
info.remove(user);
Final step: Save
db.saveDatabase();
Load database
db.loadDatabase({}, function () {
var info = db.getCollection('info');
console.log('Info: ', info.data);
});
Put them together
function lokijsCRUD() {
  var info;
  db.loadDatabase({}, function () {
    //Initial collection
    info = db.getCollection('info');
    if(!info)
      info = db.addCollection('info');
    console.log('Initial info: ', info.data);
    //Create a user info
    info.insert({name: 'phchu',
                    age: 18});
    console.log('Add a user: ', info.data);
    //Read user's age
    var user = info.findObject({'name':'phchu'});
    console.log('User '+user.name+' is '+ user.age +' years old.');
    //Update user's age
    user.age = 30;
    info.update(user);
    console.log('User '+user.name+' is '+ user.age +' years old.');
    //Delete the user
    info.remove(user);
    console.log('Collection info: ', info.data);
    //Save
    profilesDB.saveDatabase();
  });
}
Result
Initial info: []
Add a user: [ { name: 'phchu',
age: 18,
meta: { revision: 0, created: 1463638026851, version: 0 },
'$loki': 1 } ]
User phchu is 18 years old.
User phchu is 30 years old.
Collection info: []
技術提供:Blogger.

